What Does Hotel Check-In Desk Planning Actually Involve?
This guide covers desk dimensions, materials, layout, technology, budget, and common planning mistakes.
Hotel check-in desk planning refers to sizing, material, layout, and technology decisions made together.
A front desk is more than a countertop. It has to fit staff workflows, hide equipment, and still feel welcoming.
Get the dimensions wrong and staff work in a cramped space all day. Get the materials wrong and the desk looks worn within a year.
This guide walks through each decision in the order most projects actually make it, starting with the numbers that shape everything else.
Hidden technology deserves the same planning as visible finishes. A desk built around a laptop tucked under the counter rarely survives daily use, and retrofitting it later almost always costs more than planning it upfront.
Every choice below also affects your budget and your construction timeline. Deciding these details early avoids expensive change orders once the millwork is already underway. Independent hotels and multi-property groups approach this differently, and both are covered below.
What Are the Right Dimensions for a Hotel Check-In Desk?
A standard two-person check-in desk spans 96 to 144 inches wide.
These numbers come from real desk-dimension standards, not a single architect's preference. Treat them as the starting checklist for your own layout, then adjust for your property's actual guest volume.
Width and Depth per Staff Member
Desk width and depth decisions should start with your actual staff count, not a generic template.
- Desk width: plan 48 to 72 inches of width per active staff position
- Two-agent pod: requires the full 96 to 144 inch range
- Desk depth: keep between 28 and 36 inches
- Deeper desks: hide keycard encoders, keyboards, and PMS screens from the guest-facing side
- Kiosk allowance: add extra depth if a nearby tablet or kiosk station is planned
Measure your real staff count before finalizing these numbers. The first proposal from an architect rarely matches how your team actually works the desk day to day.
Properties that expect to grow should plan for one additional position now, even if it stays unstaffed for the first year. Expanding a finished desk later is far more disruptive than leaving room for it during construction.
Counter Heights and ADA Access
Height is where guest comfort and staff ergonomics pull in different directions, so plan for both at once.
- Guest-facing standing counter: 42 inches, the standard commercial height
- Interior staff workspace: around 30 inches, to support proper seated ergonomics
- ADA-accessible section: no higher than 36 inches
- ADA minimum width: 36 inches, with clear knee space underneath
- Legal status: this is a code requirement, not a design preference
Build the accessible section into the original layout from day one. Retrofitting it after construction costs far more than planning it upfront.
Staff-Side Clearance You Cannot Skip
Everything behind the desk needs its own footprint too, and it's the part most layouts underestimate.
- Minimum clearance: 36 inches of clear floor space behind the desk
- Chair room: space for rolling office chairs during shift changes
- Equipment room: a shredder, printer, and spare keyboard all need a home
- Passing room: enough clearance for two staff to pass each other during a rush
Walk the space with your actual front desk team before finalizing it. They will notice gaps a floor plan alone never shows.
How Should the Desk Fit Into Your Lobby Layout?
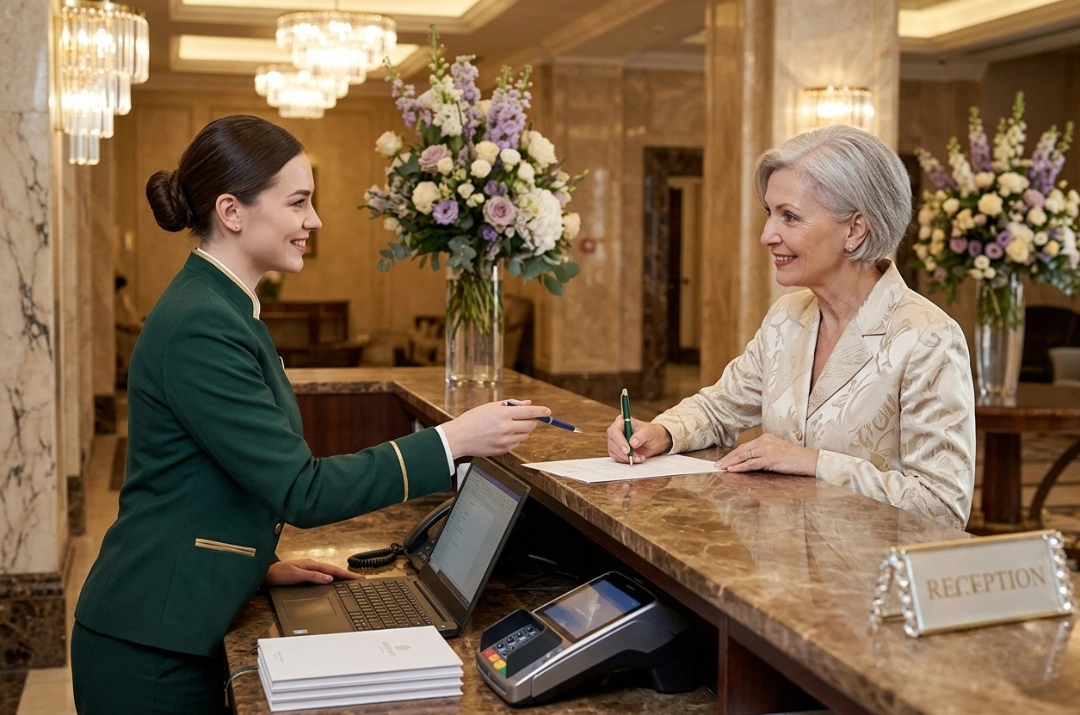
Position the desk with a clear, unobstructed sightline from the main entrance.
Arriving guests should instinctively know where to walk. An unobstructed sightline from the entrance does that work automatically, before a single sign or staff member says a word.
Avoid positioning the desk directly against:
- Elevator banks
- Restaurant or bar entrances
- Paths with heavy staff-only foot traffic
Each of these creates congestion right where guests are trying to orient themselves, and the effect gets worse during peak morning check-outs.
A clear buffer zone between the desk and the main entryway helps too. Guests need a moment to take in the space before they approach, rather than being funneled straight into a transaction.
Wayfinding signage near the desk reduces pressure on staff too. A small sign pointing toward elevators, restrooms, or the restaurant answers questions before a guest has to ask, freeing staff to focus on the actual check-in.
Give the Queue Somewhere to Go
Dedicate real space for a waiting line that does not block walking paths. A queue spilling into the entrance frustrates every guest behind it, not just the one at the front.
Boutique properties often soften this with nearby lounge seating or a coffee station. It turns a wait into something guests barely notice.
Larger properties may need stanchions or a defined queue path instead. Match the solution to your actual guest volume rather than copying a boutique layout at scale.
Bus tours, conferences, and event groups can turn a well planned desk into a bottleneck within minutes. Plan a secondary check-in point or a mobile check-in station for these predictable surges.
Staff scheduling matters as much as the physical layout here. A desk built for two agents still bottlenecks if only one person is working the busiest hour of the day.
Let Lighting Do Some of the Work
Lighting shapes the first impression as much as the desk itself. Bright, even light at the counter reads as clean and professional, while dim or uneven lighting can make even a well built desk feel dated.
Layer ambient lobby lighting with focused task lighting at the counter surface. Staff need enough light to read documents and screens without guests feeling like they are under a spotlight.
Back-lit panels on the vertical face can reinforce brand identity without adding a single extra sign. Keep this lighting subtle so it supports the desk rather than competing with it.
Which Materials Hold Up at a Hotel Front Desk?
Engineered quartz, granite, and solid surfaces outlast marble or laminate at the counter edge.
Front desk counters face constant wear from dragged luggage, keys, and heavy cleaning. Material choice should follow which surface actually gets touched, not just which one looks best in a rendering.
| Desk Zone | Best Material Choice | Why |
|---|
| Transactional edge (guest contact) | Engineered quartz, granite, or solid surface | Resists dragged luggage, keys, and daily wear |
| Vertical face (decorative) | Wood veneer, metal accents, back-lit panels | Guests rarely touch this surface |
| Base (toe kick) | Recessed stainless steel or rubber | Absorbs scuffs from shoes and bell carts |
Save decorative wood and metal accents for the vertical face guests rarely touch. That is where warmth matters more than durability, since it never takes direct impact.
Install a recessed toe kick at the base, four inches is standard. It protects the main millwork finish from scuffs that bell carts and shoes cause every single day.
Confirm every transactional surface can handle daily disinfecting without discoloring or clouding. Housekeeping and front desk staff will clean this surface far more often than any other in the lobby.
Local building and fire codes can also affect material choices, particularly around flammability ratings for the vertical face. Confirm requirements with your contractor before finalizing a material order, not after it arrives on site.
How Do You Plan for Technology at the Desk?
Hide cable runs, ventilation, and PMS hardware inside the millwork during the build phase.
A messy front desk undercuts a hotel's brand the moment a guest walks up. Hidden infrastructure keeps that first impression clean, no matter how much equipment sits behind the counter.
Plan these into the millwork phase itself, not as an afterthought once construction is done:
- Full length internal cable raceways for power and network cords
- Surface mounted grommet holes to route cords cleanly to each workstation
- Slotted ventilation grilles inside lower cabinets, to stop computer towers and backup batteries from overheating
- A dedicated alcove or footprint for a self-service kiosk or tablet, sized and wired alongside the main desk
- A network drop and outlet near any planned keyless entry or digital key hardware
None of this hiding matters if staff feel cramped running their actual software all day. Give the workstation real room for the screens staff use most, since that is where most of a shift actually happens.
A brief power outage should never stop guests from checking in. Plan for a small battery backup at the desk so staff can finish an active transaction even if the building loses power for a moment.
Building the desk around fast property management software keeps check-ins quick during rushes, instead of adding a slow system on top of an already tight space.
How Should Multi-Property Hotel Groups Standardize Desk Planning?
A single independent hotel can treat every choice above as one project with one set of decisions. Hotel groups running several properties face a different problem entirely.
Set one shared standard for dimensions, materials, and technology footprint across every property in the group. That standard should still flex for each lobby's actual size and guest volume.
A shared standard also simplifies staff training and transfers. An agent moving between properties should recognize the same desk logic even if the finishes look different.
Centralize the technology decisions in particular. Consistent cable planning and a shared property management system across properties save far more time than matching countertop colors ever will.
How Much Should You Budget for a Check-In Desk Project?
A check-in desk project has three real cost drivers: square footage of millwork, material grade, and the complexity of the hidden technology work. Costs vary widely by market and contractor, so treat any number outside a formal quote as a rough placeholder only.
Get quotes after your dimensions and material choices are locked, not before. A quote based on an unfinished plan almost always changes once the final scope is clear.
Build in a contingency for technology and electrical work specifically. Cable runs and ventilation are the items most likely to be underestimated in an initial quote.
What Common Mistakes Should You Avoid When Planning a Check-In Desk?
Even a well proportioned desk fails if a few avoidable mistakes slip into the plan. These are the ones that show up most often once a property is already open.
Skipping ADA Access Until Construction Is Done
Treating the accessible section as an add-on almost always means squeezing it into leftover space. Plan the lowered, wider section as a core part of the desk from the first drawing, not a compliance patch at the end.
Sizing the Desk for Today's Staff Count Only
A desk sized exactly to your current headcount leaves no room to grow. Even one extra staff position worth of space protects against an expensive expansion later.
Forgetting Where the Bell Cart and Luggage Actually Go
Luggage carts need a clear path to and from the desk that does not cross the main guest queue. Properties that skip this end up with carts blocking the exact sightline the desk was designed around.
Treating Technology as an Add-On Instead of a Build Requirement
Cable runs, ventilation, and kiosk footprints are far cheaper to build in than to retrofit. Once the millwork is finished, adding a raceway or grommet hole means cutting into a surface that was never designed for it.
roommaster's front desk software fits any well planned check-in desk, keeping every check-in fast. See the front desk software in action and book a free demo today.
{{cta-strip}}
Frequently Asked Questions
1. What is hotel check-in desk planning?
Hotel check-in desk planning is deciding dimensions, materials, layout, and technology as one project. Skipping any piece early creates costly rework later.
2. How wide should a hotel check-in desk be?
Plan 96 to 144 inches for a standard two-person desk. Single-agent setups can start closer to 48 inches wide.
3. What counter height meets ADA requirements?
ADA requires an accessible section no higher than 36 inches. That section also needs a 36 inch minimum width and clear knee space.
4. What materials work best for a check-in desk counter?
Engineered quartz, granite, and solid surfaces resist daily wear best. Save wood veneer and metal accents for the vertical face instead.
5. How much clearance does staff need behind the desk?
Leave at least 36 inches of clear floor space behind the desk. That room fits rolling chairs, a shredder, and a printer.

.png)
.png)
.png)